


Capture The Flag 101 – WTF is CTF?
CTF stands for Capture The Flag (also Counter Terrorist Financing, which we may look at in a different post). In a nutshell, an image of a network and or operating system is created with various “deliberate mistakes” built in and the challenge is issued for us to to break into the system. Some are set up just requiring us to get root or supervisor access (Boot to Root). Others have various target files or “flags” that need to be recovered or achieved to win. Some CTF sites provide an online environment for our hacking pleasure but many CTF challenges require us to download the challenge in the form of a virtual machine (VM) which we import into a virtual network on which we can play without worrying about setting off alarm bells at our ISP or possibly damaging our own machines. To do this it is important that we know how to setup a virtual lab. In this post we will install one of the popular virtual machine environments (VirtualBox), install Kali Linux which is a Linux distro built specifically for penetration testing and loaded with fun tools. We will also install Metasploitable 2 which is a VM specifically designed to be the target of penetration testing. It has many vulnerabilities deliberately left open so that we can practice. We will then set up a virtual network for these VMs to communicate on and try some exploits. There is a Metasploitable 3 however it is a bit more complicated to set up so we will deal with that in a separate post.
Install VirtualBox
Virtual Machines Are A Must
- Download the install package from the Virtualbox Wiki. Look for the latest platform packages and for this exercise download and install the Windows Host package. Just use the default settings for now.
- Download the VM VirtualBox Extension Pack
- Run VirtualBox and navigate to File → Preferences → Extensions
- Click on the + icon and navigate to the extensions pack you downloaded, select the package and click open.
Phase One Complete!
Phase Two – Install Kali VM
Kali is a Linux distro based to Debian that is specifically designed for penetration testing. It is NOT very useful as a general desktop but is loaded with goodies to help us detect, enumerate and exploit vulnerable systems. Developed and maintained by Offensive Security it is a must have for learning and professional pentesters.
In this phase we will download the Kali Linux distro as a image that can be imported to VirtualBox. You could also download an .iso image and do a full install on a new VM but that is for a separate tutorial. The Image is downloaded from a torrent file so you will need a torrent client such as qBittorrent in order to complete this process.
- Navigate to the Offensive Security Kali Download Page
- Select Kali Lunix VirtualBox Images
- Click on the 32 or 64 bit Torrent link and download
- Open the torrent file in your torrent client and start the Kali download.
- Go get some coffee, browse some hacker forums, catch up on some studying (ha!)
- When the torrent is finished downloading open VirtualBox
- Select File → Import Appliance
- Click the file icon and navigate to the .ova file we have just downloaded select it and click Open
- In the Appliance Settings dialog you can make various changes to your Vm such as Name and amount of RAM, For now lets just give it a name the you will recognize.
- Click on Import and wait for VirtualBox to unpack and configure the VM
- Once the VM is imported it will appear on left under the Tools menu. Select or right-Click the VM and click Start.
- VirtualBox will boot the kali VM. The Login for older versions of Kali was Login: root and Password: toor this has changed with Kali in 2020 the details are now Login: kali and Password: kali
- Next we need to install any available updates. Start the Terminal Emulator from the icon at the top of the screen
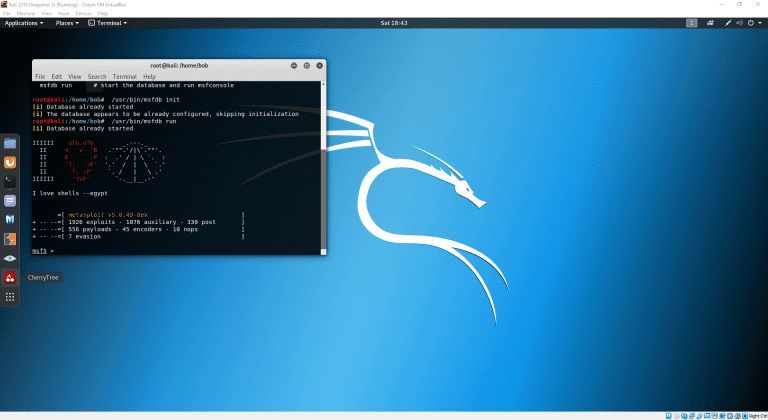
- Change to root access enter: sudo -s you may get a short warning about great power and responsibility but enter your password anyway. This will give you root privileges or full access this is not the recommended way of running Kali but for our exercise of pentesting on a virtual network it just saves a bit of time.
- at the next prompt enter: apt update && apt upgrade -y Kali will start updating, this could take a while.
- Have a bit of a look around your new Kali VM. Below is a video of our work so far.
Phase Three – Set Up Metasploitable and Virtual Network
Metasploitable is an intentionally vulnerable virtual machine created by Rapid7 to help you with your first steps using Kali Linux and in particular one of the most popular utilities it features called Metasploit. The Metasploit framework is a suite of tools we can use to scan, enumerate and exploit networks. basically a collection of commonly used tools that provide a complete environment for penetration testing and exploit development.
In this phase we will download the Metasploitable VM image, import it into VirtualBox and then connect the Kali and Metasploitable VMs to their own virtual network creating our virtual pentesting lab.
- Navigate to the Metasploitable Sourceforge Page .
- Select Download. Save the .ZIP archive to a drive with room to spare.
- Navigate to the .ZIP file and extract to your hard disk. This will extract the virtual disk image and its support files.
- Open VirtualBox and select New from the main menu.
- Give your new Machine a name.
- In Machine Folder select the folder you extracted the image to.
- In type select Linux.
- In version select Ubuntu (64-bit) then click Next.
- Keep the default memory size and click Next again.
- In the Hard disk dialogue box select Use and Existing Hard Disk File.
- In the hard Disk Selector Click Add and Navigate to the extracted image file.
- Select the image file and click Open.
- Back in the hard Disk Selector select the metasploit.vmdk and click choose.
- Back in the hard Disk Dialogue make sure the Metasplit.vmdk image is selected and click Create.
- Your VM will be created with all of the defaust settings. You can now select Start.
- When Metasploit is finished booting up you will see exactly how secure it is as the login details are provided on the startup splash screen.
Next we need to connect Kali and Metasploit to a virtual network that will let them communicate with each other.
- First close Kali and Metasploit if they are still open.
- In the VirtualBox Manager select File → Host Network Manager,
- If no adapters are listed click Create to make one.
- Highlight the VirtualBox Host-only Ethernet Adapter and enable the DHCP server.
- In the DHCP server tab check the Upper Address Bound and lower it to a more reasonable number then Close. This setting controls how many IP addresses will be available to VMs so we don’t need 100 of them.
- Highlight the Kali VM and select Settings → Network.
- In the Adapter 1 tab tick Enable network Adapter.
- In the Attached To drop down select Host-Only Adapter.
- Select the Adapter 2 tab and tick the Enable box.
- In the Attached To drop down select Bridged Adapter.
- Click Ok
- Highlight the Metasploitable VM and select Settings → Network
- In the Adapter 1 tab tick Enable network Adapter.
- In the Attached To drop down select Host-Only Adapter.
- To test the network start both VMs and Login
- At the command line check the IP Address with ifconfig.
- You want both machines to have the same first three numbers. ie 192.168.56.xx
- If the Kali VM is showing an internal network IP address use the network settings to change the adapter.
- Once both VMs ae one the same IP subnet use the ping command to confirm their communication.
- We now have a Virtual Lab. Have a look at the video below for a run through of our work so far.

